When your speakers fall silent, or your headphones refuse to sing, it's more than just a minor annoyance—it's a frustrating halt to your productivity, entertainment, or even your focus. External audio device and cable connection issues are among the most common culprits, transforming your vibrant digital world into an unwelcome quiet zone. You've checked the volume, given the cable a jiggle, and still, nothing. What gives?
Fear not, audio adventurer. This isn't just a technical breakdown; it's your comprehensive guide to diagnosing and fixing those elusive sound problems. We’re going beyond the obvious to arm you with the knowledge and steps to bring your audio back to life.
At a Glance: Quick Fixes for Silent Speakers
Before we dive deep, here’s a rapid-fire checklist of common solutions:
- Check Volume Levels: System, application, and physical device volume controls. Ensure nothing is muted!
- Verify Audio Output: Make sure your computer is sending sound to the correct device (speakers, headphones).
- Inspect Physical Connections: Wires, ports, and Bluetooth pairing – ensure everything is snug and correct.
- Give It a Restart: A simple reboot can often clear temporary software glitches.
- Update or Reinstall Drivers: Outdated or corrupted audio drivers are frequent troublemakers.
- Run the Troubleshooter: Windows has built-in tools designed to pinpoint audio problems.
- Test with Another Device: Rule out a faulty speaker or headphone by trying an alternative.
The Silent Scenarios: Why Your Audio Goes Awry
Audio issues can feel like a tangled knot, but they usually stem from a few core areas. Understanding these categories is the first step toward untangling the problem:
- User Error (We've All Been There): Muted volumes, incorrect output selected, or a forgotten cable unplugged. These are often the easiest, and most embarrassing, fixes.
- Cable & Connection Woes: A loose cable, a worn-out port, or a flaky Bluetooth connection can stop sound dead in its tracks.
- Software Shenanigans: Outdated audio drivers, conflicting applications, or even a misconfigured sound setting within Windows can silence your system.
- Hardware Hiccups: In rare cases, the audio device itself (speakers, headphones), your computer's sound card, or even the motherboard might be experiencing a fault.
- The Unseen Threat: While less common, malware can sometimes interfere with system settings, including audio.
Don't fret if the terminology seems daunting. We'll walk you through each potential issue with clear, actionable advice.
First Check: The Obvious (Yet Often Missed) Suspects
It sounds cliché, but often, the simplest solutions are the most effective. Before tearing your hair out over complex driver issues, let's confirm the basics.
Is Your Volume Actually On? A Three-Way Check
This might seem elementary, but it's astonishing how often a muted setting can cause a phantom "no sound" problem. There are usually three places to check your volume:
- System Volume: Look for the speaker icon in your system tray (usually bottom-right of your screen). Click it and ensure the volume slider is up and not muted. If you see an "X" or a circle with a line through it, click it to unmute.
- Application Volume: Are you only having trouble with sound from one program, like a browser, a game, or a specific media player? Many applications have their own internal volume controls. Check within the app itself. Windows also has a "Volume Mixer" (right-click the speaker icon > Open Sound settings > App volume and device preferences, or right-click speaker icon > Open Volume Mixer) where you can adjust volume for individual applications.
- Device Volume: Your external speakers, headphones, or soundbar usually have their own physical volume knobs, buttons, or remote controls. Ensure these are turned up and not muted. Sometimes, a tiny switch on a headphone cable can be the culprit.
The Right Output: Directing Your Sound Where It Needs to Go
Your computer might be trying to send audio to the wrong place. If you've ever plugged in headphones and forgotten to unplug them, your speakers will remain silent.
- Access Sound Settings: Right-click the speaker icon in your system tray and select "Sound settings" (Windows 10) or "Sound" (Windows 11).
- Choose Your Output Device: Under the "Output" section, you'll see a dropdown menu labeled "Choose your output device." Click this and select the external speakers, headphones, or soundbar you intend to use. Ensure it's not set to "Speakers (Realtek High Definition Audio)" if you're using external USB speakers, for instance, or a monitor with built-in speakers you don't want to use.
- Set as Default: For consistent use, ensure your preferred device is set as the default playback device.
If you have multiple devices connected, it's easy for the system to get confused. Always verify this setting after connecting new audio gear or if you switch between devices frequently.
Inspecting Physical Connections: The Cable Dance
Loose cables are the bane of audio existence. A cable that looks connected might not be fully seated, leading to intermittent sound or complete silence.
- Unplug and Re-plug: For every audio cable, carefully unplug it from both your computer and the audio device, then firmly re-insert it. Listen for a satisfying "click" for jacks, or ensure USB plugs are snug.
- Check the Right Ports: This is crucial.
- 3.5mm Analog: Green is typically for audio output (speakers/headphones). Pink is for microphone input. Blue is for line-in. Mixing these up is a common error. Ensure your speakers are plugged into the green port on your computer's sound card.
- USB Audio: For USB speakers or headsets, try a different USB port on your computer. Sometimes, a specific USB port can be faulty or lack sufficient power.
- Optical (TOSLINK) / Coaxial: These digital connections need to be firmly seated at both ends.
- HDMI: If you're using an HDMI cable for audio (e.g., to a monitor or TV), ensure it's secure. While this guide primarily focuses on dedicated audio devices, understanding how different display connections carry sound is helpful. For example, if you're dealing with display-related sound issues, you might find some parallels when you're fixing LG TV no sound.
- Test the Cable Itself: If you have a spare audio cable, try swapping it out. Cables can fray internally, even if they look fine on the outside. This is especially true for older or frequently bent cables.
- Bluetooth Connections:
- Ensure Pairing: Is your Bluetooth device properly paired with your computer? Go to Settings > Devices > Bluetooth & other devices (Windows 10) or Settings > Bluetooth & devices (Windows 11) and check its status.
- Connect Manually: Sometimes, you might need to manually click "Connect" for the device.
- Toggle Bluetooth: Turn Bluetooth off on your computer, wait a few seconds, then turn it back on. Do the same for your audio device.
- Check Battery: For wireless devices, ensure they're charged!
Digging Deeper: Software and System Solutions
If the easy fixes didn't work, it's time to delve into the software side of things. Many audio issues hide in your operating system's settings or behind outdated drivers.
The Power of a Reboot: Your First Software Step
This isn't a joke; it's genuinely effective. A simple restart can resolve a myriad of temporary software glitches, memory conflicts, or processes that have frozen. Close all applications, then perform a full shutdown and restart of your computer. Test the sound afterward. You'd be surprised how often this works.
Driver Drama: Updating and Reinstalling for Clarity
Audio drivers are tiny software programs that allow your operating system to communicate with your sound hardware. If these drivers are old, corrupted, or incompatible, your audio will suffer.
- Update Your Drivers:
- Right-click the Start button and select Device Manager.
- Expand "Sound, video and game controllers."
- Right-click on your audio device (it might be "Realtek High Definition Audio," "NVIDIA High Definition Audio," or "AMD High Definition Audio Device," among others) and select "Update driver."
- Choose "Search automatically for updated driver software." If Windows finds a newer driver, install it.
- Restart your computer.
- Reinstall Your Drivers: If updating doesn't work, or if your drivers appear to be corrupted, a fresh installation can often fix things.
- In Device Manager, right-click your audio device and select "Uninstall device."
- Crucially, if prompted, do NOT check "Delete the driver software for this device." (Unless you're planning a completely clean install from the manufacturer's website).
- Restart your computer. Windows will usually detect the missing audio hardware during startup and automatically reinstall a generic driver. You can then try step 4 from "Update Your Drivers" again, or visit your computer manufacturer's website (Dell, HP, Lenovo, ASUS, etc.) or motherboard manufacturer's website to download the latest, official audio driver for your specific model.
- Install the downloaded driver and restart.
Pro Tip: Sometimes, the generic Windows driver works better than a buggy manufacturer driver, or vice-versa. If you're having trouble, don't be afraid to experiment with both options.
Windows' Own Detective: The Audio Troubleshooter
Windows comes equipped with diagnostic tools to help you identify and fix common problems. The Audio Troubleshooter is surprisingly effective.
- Run the Troubleshooter (Windows 10):
- Go to Settings > Update & Security > Troubleshoot.
- Click "Additional troubleshooters."
- Select "Playing Audio" and then "Run the troubleshooter."
- Follow the on-screen prompts. It will often ask you which device you're troubleshooting and attempt to apply fixes automatically.
- Run the Troubleshooter (Windows 11):
- Go to Settings > System > Troubleshoot.
- Click "Other troubleshooters."
- Find "Playing Audio" and click "Run."
- Follow the prompts.
The troubleshooter can often reset services, reconfigure settings, or identify driver issues, giving you a clearer path forward.
Enhancements Gone Rogue: A Clearer Path to Sound
Audio "enhancements" like bass boost, virtual surround sound, or loudness equalization can sometimes conflict with certain applications or drivers, leading to distorted sound or no sound at all.
- Disable Audio Enhancements:
- Right-click the speaker icon in your system tray and select "Sounds."
- Go to the "Playback" tab.
- Right-click your active audio device (your speakers/headphones) and select "Properties."
- Go to the "Enhancements" tab (or "Spatial Sound" tab on some systems).
- Check the box that says "Disable all enhancements" or set Spatial Sound to "Off."
- Click "Apply," then "OK," and test your sound.
If disabling enhancements resolves the issue, you can try re-enabling them one by one to pinpoint the specific enhancement causing the problem.
Hardware Hunt: Is It Your Gear or the Port?
Sometimes, the problem isn't with your computer's settings or software, but with the physical audio equipment itself or the port it's connected to.
The Device Swap Test: Pinpointing the Faulty Link
This is a critical step to determine if your external speakers or headphones are the problem, or if the issue lies with your computer.
- Connect Another Audio Device: Grab any other set of headphones, earbuds, or speakers you have lying around. Plug them into the same audio port you were trying to use for your original device.
- Test: Play some audio.
- If the new device works: Your original speakers/headphones are likely faulty.
- If the new device also doesn't work: The problem is likely with your computer (the port, internal sound card, or software configuration).
This quick swap saves you from chasing ghosts in your software if your speakers were dead all along.
Trying Different Ports: When the Connection Itself is Suspect
Even if your external audio device works fine, the port on your computer might be the issue.
- For USB Devices: If you're using USB speakers or a headset, try plugging them into a different USB port on your computer. Some ports (especially older USB 2.0 ports compared to USB 3.0/3.1) might behave differently, or one port might be physically damaged.
- For 3.5mm Jacks: If your computer has both front and rear audio jacks, try switching between them. The front panel jacks are sometimes connected via an internal cable that can become loose or faulty. If you're using a laptop, you typically only have one or two combo jacks, but the principle applies: if you have a docking station with its own audio outputs, try that.
Beyond the Basics: Advanced Checks & Prevention
If you've tried everything above and your audio is still playing hide-and-seek, it's time for some deeper system checks and proactive measures.
OS Updates: A Foundation for Sound
Microsoft regularly releases updates for Windows that include bug fixes, security patches, and sometimes, updated driver components. Running an outdated operating system can lead to various compatibility issues, including audio problems.
- Check for Updates:
- Go to Settings > Update & Security > Windows Update (Windows 10).
- Go to Settings > Windows Update (Windows 11).
- Click "Check for updates" and install any pending updates.
- Restart your computer after installation.
Keeping your OS current is a good practice for overall system stability, not just audio.
Background Interlopers: Apps & Processes
Sometimes, another application or background process can hijack your audio output or cause conflicts. This is particularly common with communication apps (like Zoom, Discord, Teams) or recording software that might try to take exclusive control of your sound device.
- Close Unnecessary Applications: Before testing, close any programs that might be using your audio.
- Check "Exclusive Mode":
- Right-click the speaker icon in the system tray and select "Sounds."
- Go to the "Playback" tab.
- Right-click your active audio device and select "Properties."
- Go to the "Advanced" tab.
- Under "Exclusive Mode," uncheck "Allow applications to take exclusive control of this device."
- Click "Apply," then "OK." This prevents single applications from monopolizing your sound card.
The Malware Menace: A Rare but Nasty Cause
While less frequent, certain types of malware can corrupt system files, interfere with drivers, or alter settings, potentially causing audio issues.
- Run a Full System Scan: Ensure your antivirus software is up-to-date and run a comprehensive scan of your entire system. If any threats are detected, follow your antivirus's instructions for removal and then re-test your audio.
- Windows Security: Utilize the built-in Windows Security (formerly Windows Defender) for a quick check. Go to Settings > Update & Security > Windows Security (Windows 10) or Settings > Privacy & security > Windows Security (Windows 11).
Customizing Your Sound Experience: Control Panel Deep Dive
For more granular control, the older Windows Control Panel still offers some settings not readily available in the modern Settings app.
- Access Sound from Control Panel:
- Search for "Control Panel" in the Windows search bar and open it.
- Change "View by" to "Large icons" or "Small icons."
- Click "Sound." This opens the classic Sound dialog box.
- From the "Playback" tab, you can right-click your device > Properties > Advanced and experiment with different "Default Format" bit rates and sample rates. Sometimes, a mismatch here can cause issues, especially with older hardware or specific applications.
This area also lets you configure speaker setups (stereo, 5.1, etc.) and run tests for individual speaker channels, which can be invaluable for diagnosing multi-channel audio systems.
Analog vs. Digital: Understanding Your Connections
A quick word on the different ways audio travels:
- Analog (e.g., 3.5mm jacks): These transmit electrical signals that directly represent the sound wave. They're prone to interference over long distances or with poorly shielded cables. Simpler, but can pick up "noise."
- Digital (e.g., USB, HDMI, Optical, Coaxial): These transmit audio as binary data (0s and 1s). The sound quality is generally less susceptible to external interference, as the signal is reconstructed at the receiving end. USB connections are particularly versatile, carrying both power and data, making them ideal for many external audio devices. Getting a firm understanding of your connection types is vital for troubleshooting.
Common Audio Connection Pitfalls to Avoid
Even seasoned tech users can stumble over these seemingly small issues:
- Using the Wrong Jack: Plugging headphones into the microphone jack (pink) instead of the headphone jack (green) on an analog system.
- Ignoring Driver Updates: Thinking "if it ain't broke, don't fix it" with drivers can lead to compatibility issues after OS updates or new software installations.
- Overlooking Power: Active speakers and some external audio interfaces require their own power source. Ensure they're plugged in and switched on.
- Bluetooth Range and Interference: Trying to use Bluetooth devices too far from your computer or in an environment saturated with other wireless signals can lead to dropouts or disconnections. Sometimes even interference from nearby Wi-Fi networks or microwaves can cause problems. In a related vein, optimizing all connections, whether wired or wireless, is essential for a smooth experience. You might even find some useful concepts applicable when looking at ways to improve Wi-Fi range or signal quality.
- "Exclusive Mode" Conflicts: As discussed, this setting can be a sneaky culprit, especially for gamers or audio producers who use specialized software.
When to Call in the Pros (or Replace Gear)
Despite your best efforts, some problems simply require professional attention or indicate a hardware failure.
- Persistent Hardware Issues: If the problem follows the device (e.g., your headphones don't work on any computer, or your speakers are silent regardless of the input source), the device itself is likely broken.
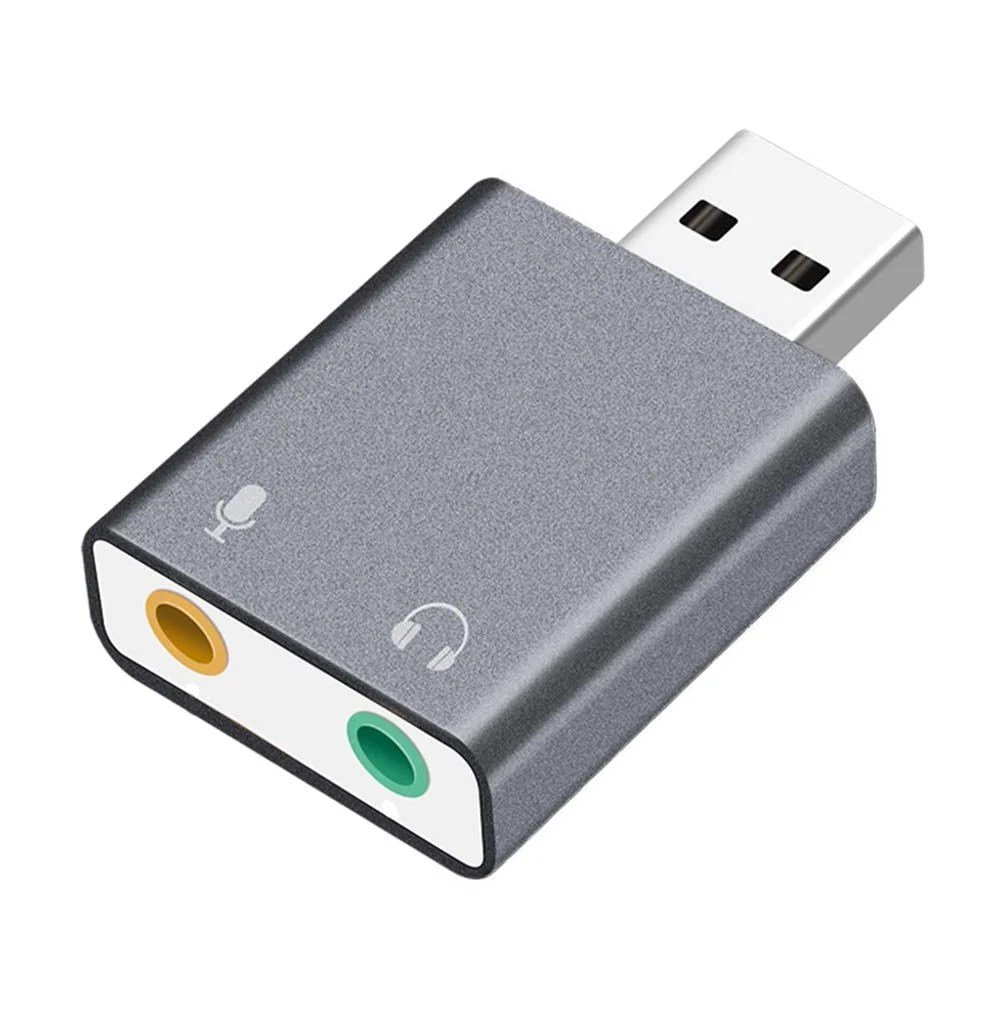
- Internal Sound Card Failure: If no audio device works (even a known good one) through any of your computer's analog or digital audio ports, your internal sound card might be faulty. A relatively inexpensive USB sound card or dongle can often bypass this issue without needing a full repair, especially on a laptop.
- Motherboard Issues: In rare, severe cases, the audio circuits on your motherboard might be damaged. This usually comes with other significant system instability.
- Warranty Check: If your computer or external audio device is still under warranty, it's definitely time to contact the manufacturer.
Before reaching out for professional help, clearly document all the troubleshooting steps you've already taken. This will save time and potential diagnostic fees.
Your Action Plan: Bringing the Sound Back
Dealing with external audio device and cable connection issues can be a process of elimination, but it's a solvable one. Start with the simplest checks, work your way through the software diagnostics, and then consider hardware swaps. Most sound problems are not catastrophic; they're merely a puzzle waiting for you to solve.
The key is patience and systematic troubleshooting. Don't jump ahead. Follow the steps, test after each change, and soon, you'll be back to enjoying your music, podcasts, and video calls without a hitch. Good luck, and may your speakers always sing!