Your computer, that indispensable sidekick for work, play, and everything in between, often communicates its woes in whispers before it shouts. Catching those subtle cues—the tell-tale signs of impending hardware failure—and knowing how to interpret them with advanced diagnostics can save you from lost data, frustrating downtime, and costly repairs. This isn't just about spotting a Blue Screen of Death; it's about understanding the intricate language your PC speaks when its components are under stress or failing, empowering you to diagnose and act with confidence.
At a Glance: Key Takeaways for Proactive PC Health
- Recognize the Early Warnings: Slow apps, crashes, freezes, and persistent high resource usage are often the first signs of hardware trouble.
- Leverage Built-in Windows Tools: Reliability History, Event Viewer, and Memory Diagnostic are powerful, often overlooked first-line diagnostic tools.
- Deep Dive with Third-Party Utilities: For granular insights, specialized tools like HWiNFO, CrystalDiskInfo, MemTest86+, and FurMark are indispensable.
- Interpret Error Codes: Learn to correlate BSOD codes, Event Viewer IDs, and SMART data to specific hardware components.
- Prioritize Prevention: Regular temperature monitoring, driver updates, and physical cleaning are your best defenses against future failures.
- Always Back Up Your Data: Before attempting any complex diagnostics or repairs, secure your critical files.
The Whispers of Trouble: Recognizing Hardware Failure Symptoms
Before you dive into the nitty-gritty of diagnostic tools, it’s crucial to attune yourself to the common symptoms your PC throws your way. Think of these as your computer's distress signals. Ignoring them can lead to a minor glitch escalating into a catastrophic hardware failure.
You might notice applications taking an eternity to open, or Windows itself suddenly crashing and restarting without warning. Frequent system freezes that demand a hard reboot are another red flag. Blue Screens of Death (BSODs) can be particularly unsettling; if they appear without a discernible pattern or after a specific action, they scream hardware. Persistent 100% CPU or RAM usage in Task Manager, even when you're just browsing, often points to a bottleneck or a failing component. Even seemingly benign errors during software installation or driver updates can hint at deeper issues.
These symptoms aren't always definitive hardware failures; sometimes, they're born from corrupt drivers, dangerously high temperatures, or even malware lurking in the background. However, they're always a call to investigate.
Your First Line of Defense: Windows' Built-in Diagnostic Arsenal
Before you download a single third-party tool, remember that Windows 11 (and previous versions) comes packed with robust utilities designed to help you peek under the hood. These are your foundational tools, often providing enough clues to narrow down the problem.
Reliability History: Your PC's Emotional Journal
Imagine a diary that meticulously records every critical error, warning, and significant change your system has experienced. That's Reliability History. Accessed by searching for "Reliability Monitor" or "View reliability history," this graphical report provides an easy-to-digest timeline.
You'll see a series of columns, each representing a day, with symbols indicating system events: a red circle with an 'X' for critical errors (like crashes or unexpected shutdowns), a yellow triangle for warnings (software issues, failed updates), and blue 'i' for information (successful updates, installations). Clicking on a specific day reveals a detailed list of events. Look for repeated critical errors around the time your symptoms began. The "Technical Details" can offer clues like failed modules or specific error codes, which are invaluable for further research. You can even save this report as an .XML file if you need to share it.
Event Viewer: The System's Black Box
If Reliability History is the diary, the Event Viewer is the system's "black box"—a comprehensive log of every important action, warning, error, or security event. It's granular, sometimes overwhelming, but incredibly powerful.
Accessing It: The quickest way is through the Win + X menu, then selecting "Event Viewer," or by simply searching for it in the Start menu.
Key Logs to Check: Inside, navigate to "Windows Logs." Here you'll find:
- Application: Errors related to specific software.
- Security: Login attempts, file access, and other security-related events.
- System: This is your primary target for hardware issues. It logs errors from drivers, disk warnings, system services, and critical events leading up to blue screens.
Filtering for Insights: Don't try to read every entry. Use the "Filter Current Log..." option in the right-hand pane. Filter by "Event level" (Critical, Error, Warning) and specify "Event sources" (e.g., Disk, Kernel-Power, nvlddmkm for Nvidia issues). This lets you cut through the noise and pinpoint recurring issues. Look for patterns, time stamps coinciding with your symptoms, and specific Event IDs or descriptions.
Performance & Resource Monitors: Real-time Vital Signs
When your PC feels sluggish, these tools offer real-time insights into your system's resource consumption, helping you spot bottlenecks or unusual activity.
- Performance Monitor: Search for "Performance Monitor" to launch it. It provides detailed graphs for various metrics like CPU, disk, network, and power usage. You can custom-configure it to monitor specific counters. This is particularly useful for correlating sudden power spikes or drops with system crashes.
- Resource Monitor: Accessible from Task Manager (under the "Performance" tab, click "Open Resource Monitor") or by searching, this tool gives you a more process-centric view. It breaks down CPU, RAM, disk, and network activity by individual processes, making it easy to see which application or service is hogging resources or causing saturation. High disk activity with no apparent reason, or RAM constantly at 90%+ capacity, are clear indicators to investigate.
DirectX Diagnostic Tool (DxDiag): For Multimedia Health
Experiencing issues with games, video playback, or audio? The DirectX Diagnostic Tool is your friend.
How to Use: Press Win + R, type dxdiag, and hit Enter.
This tool generates a technical report on your system's audio, video, and DirectX components. It's excellent for quickly identifying outdated drivers, multimedia integrity issues, or basic display adapter problems. Check the "Display" and "Sound" tabs for any detected errors or warnings.
Windows Memory Diagnostic: RAM's Health Check
Random Access Memory (RAM) issues are notorious for causing unpredictable crashes and BSODs. Windows has a built-in tool to scan your RAM for errors.
How to Use: Press Win + R, type mdsched.exe, and hit Enter.
You'll be prompted to restart your computer to run the scan before Windows loads. This ensures a thorough check without interference from the operating system. If errors are found, you'll see a report in the Event Viewer's System log upon reboot. Persistent errors often mean a faulty RAM module that needs re-seating or replacement.
Device Manager: Driver Central
The Device Manager (right-click the Start button, select "Device Manager") is where Windows lists all your detected hardware components. It's crucial for driver-related issues.
What to Look For: Yellow warning icons next to a device indicate a missing, corrupt, or incompatible driver. A red 'X' means the device is disabled or faulty.
From here, you can right-click on a device to update its driver (though it's often better to download the latest from the manufacturer's website), uninstall a problematic driver, or disable/enable a device. If a device isn't showing up or has an error, it's a strong indicator of a driver conflict or a physical hardware problem.
System File Checker (sfc /scannow): The OS Repair Kit
Sometimes, system instability isn't directly hardware but corrupt Windows system files that mimic hardware issues.
How to Use: Open Command Prompt as an administrator (search "cmd," right-click, "Run as administrator") and type sfc /scannow, then press Enter.
This command scans and attempts to repair any corrupted or missing Windows system files. While not a hardware diagnostic per se, a clean OS is a prerequisite for accurate hardware troubleshooting.
Decoding the Digital Alarms: Common Hardware Error Interpretations
Once you've gathered data from the Windows tools, the next step is interpreting what those cryptic messages actually mean. Different components tend to fail in predictable ways, leaving distinct digital breadcrumbs.
Disk Drive Woes: Bad Blocks and Failing SMART Data
Disk errors are common and often signal a failing hard drive or SSD.
Symptoms: Slow boot times, files disappearing, applications failing to launch, or Windows constantly reporting "disk errors."
Event Viewer Clues: Look for messages like "DeviceHarddisk0DR0 has a bad block" in the System log, often accompanied by specific Event IDs (e.g., 7, 11, 153). These indicate bad sectors, loose data cables, or an imminent drive failure.
Action: Immediately back up your data! Then, use a specialized tool like CrystalDiskInfo (more on this below) to check the drive's SMART (Self-Monitoring, Analysis, and Reporting Technology) status. Look for "Reallocated Sectors Count," "Current Pending Sector Count," or any "Caution" or "Bad" health status. If any of these are present, replacement is urgent.
RAM Riddles: BSODs and Critical Reboots
RAM failures can be maddeningly intermittent but often leave clear traces in your diagnostic logs.
Symptoms: Frequent, inexplicable BSODs (especially with different error codes each time), system freezes, applications crashing, data corruption, or the computer restarting unexpectedly.
BSOD Codes: Common culprits related to RAM include 0x0000000A - IRQL_NOT_LESS_OR_EQUAL, 0x00000050 - PAGE_FAULT_IN_NONPAGED_AREA, or 0x00000124 - WHEA_UNCORRECTABLE_ERROR (though this can also point to CPU).
Reliability History/Event Viewer Clues: You'll likely see critical events indicating "computer restarted after a bug-checking failure" or application crashes immediately preceding a reboot. This can be due to faulty modules, incorrect configuration (like unstable overclocked frequencies), or simply poorly seated RAM.
Action: After running Windows Memory Diagnostic, if errors persist, consider re-seating your RAM modules. If still problematic, use MemTest86+ for a more in-depth, boot-level scan.
GPU Glitches: Driver Crashes and Visual Artifacts
Graphics Processing Unit (GPU) problems manifest visibly and can cripple your system's display capabilities.
Symptoms: Visual artifacts (garbled graphics, flickering), screen freezing during games or demanding applications, sudden black screens, or games crashing to the desktop.
Event Viewer Clues: In the System log, look for errors related to your graphics driver. For Nvidia users, nvlddmkm.sys is a common culprit. Specific error codes like 0x00000050 or 0x000000d1 often appear alongside these driver crashes.
Action: Combine Event Viewer data with GPU stress tests (like FurMark or OCCT). If errors appear during stress tests, monitor temperatures carefully (stop if above 85°C to prevent damage). Perform a clean driver reinstallation using DDU (Display Driver Uninstaller) to completely remove old driver remnants before installing the latest official drivers. Ensure adequate power delivery and ventilation for your GPU.
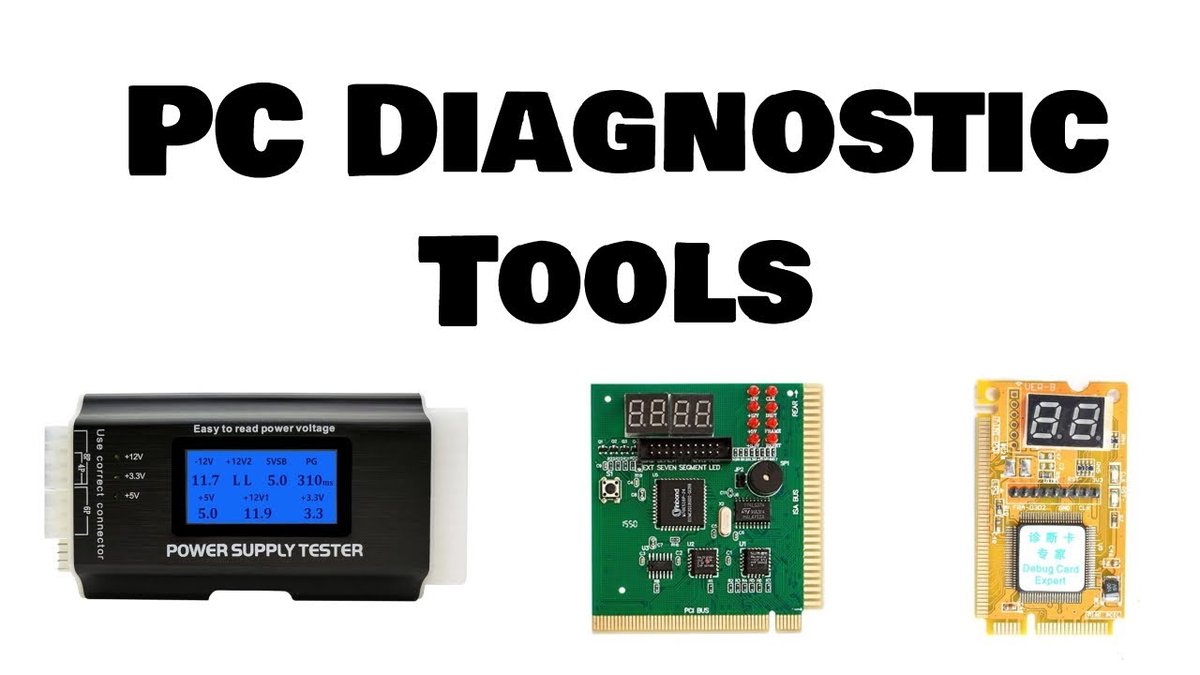
Beyond Windows: Specialized Third-Party Tools for Deep Dives
While Windows provides a solid foundation, dedicated third-party tools offer unparalleled depth for hardware diagnostics, especially when you need to stress components or monitor specific sensors.
All-in-One Monitors: HWiNFO, Speccy, Open Hardware Monitor
These tools are your central dashboard for real-time system information and sensor data.
- HWiNFO (32/64): The undisputed champion for comprehensive hardware inventory and real-time monitoring. It can track virtually every sensor on your CPU, GPU, motherboard, and disk drives, providing voltages, clock speeds, temperatures, fan speeds, and more. You can log data, generate reports, and customize graphs—it's an essential tool for any serious diagnostics.
- Speccy: A simpler, more user-friendly utility from Piriform (makers of CCleaner). It quickly gives you a snapshot of your key computer specifications, including operating system, CPU, RAM, motherboard, graphics, storage, and optical drives, along with real-time temperature readings for critical components.
- Open Hardware Monitor / HWMonitor: These free, lightweight tools excel at reading temperatures, fan speeds, voltages, and loads for your CPU, GPU, disks, and motherboard. They're excellent for quick checks during stress tests or general use to catch overheating components.
Putting the CPU to the Test: OCCT, AIDA64, Intel PDT
If your CPU is suspect, direct stress testing can reveal instability or overheating.
- OCCT (OverClock Checking Tool) / AIDA64: These are robust stability testing suites that can put your CPU under extreme, controlled load. OCCT offers various test types, including CPU:OCCT, CPU:Linpack, and Power Supply tests. AIDA64 offers a system stability test that focuses on the CPU, FPU, cache, and system memory.
Action: Run these tests for at least 30 minutes, monitoring temperatures with HWiNFO or HWMonitor. If temperatures exceed ~90°C, stop the test immediately—this indicates inadequate cooling or improper thermal paste application. Crashes or errors during these tests are a strong indicator of an unstable CPU (e.g., due to overclocking) or cooling issues. - Intel Processor Diagnostic Tool: If you have an Intel CPU, this free utility from Intel performs a comprehensive check on the processor's functionality, stability, and frequency. It's a quick and easy way to rule out your Intel CPU as the primary source of trouble.
Stressing the Graphics Card: FurMark, OCCT
GPU issues often only appear under load. Stress tests can push your graphics card to its limits.
- FurMark / OCCT (GPU Test): These applications are designed to generate maximum heat and load on your GPU. FurMark, in particular, is known as a "GPU burner" due to its intense stress.
Action: Run these tests while simultaneously monitoring your GPU temperature and clock speeds using HWiNFO or Open Hardware Monitor. Look for visual artifacts (dots, lines, or weird textures appearing on screen), freezes, or sudden crashes. Stop the test if temperatures consistently exceed 85°C, as this suggests a cooling problem. If the system reboots or artifacts appear, you likely have a failing GPU, an insufficient power supply, or cooling issues. A clean driver installation using DDU is always a good first step here.
Unveiling RAM Secrets: MemTest86+
While Windows Memory Diagnostic is good, MemTest86+ is the gold standard for RAM testing.
- How to Use: You'll need to download it and create a bootable USB drive. This tool runs extensive memory scans outside the operating system, bypassing any potential software conflicts that might interfere with Windows' own diagnostic.
Action: Let it run for at least 4-8 passes (or even overnight) for a thorough check. Even a single detected error indicates a faulty RAM module. If errors appear, test each RAM stick individually to pinpoint the culprit, and consider if your issue is a physical component, rather than a system-level software issue like a sound problem on your LG TV.
Disk Drive Deep Scans: CrystalDiskInfo, WinDirStat
For detailed insights into your storage drives.
- CrystalDiskInfo: This free utility reads and interprets SMART data from your HDDs and SSDs. It displays crucial information like temperature, usage hours, power-on count, and most importantly, the drive's overall health status (Good, Caution, Bad). Pay close attention to "Reallocated Sectors Count," "Current Pending Sector Count," and "Uncorrectable Sector Count." Any non-zero value here usually means the drive is failing or developing bad sectors.
- WinDirStat: Not a diagnostic tool in the traditional sense, but incredibly useful for visualizing disk usage. It shows you exactly what's taking up space on your drives, allowing you to identify unusually large files or space bottlenecks that might be contributing to sluggishness, if not direct failure.
Powering Through: PSU Testing with OCCT
The Power Supply Unit (PSU) is often overlooked but critical. An insufficient or failing PSU can cause random reboots, system instability under load, or even prevent your PC from booting.
- OCCT (Power Supply Test): OCCT includes a dedicated power supply test that simultaneously loads your CPU and GPU to draw maximum power from the PSU.
Action: Run this test for 15-30 minutes while monitoring system stability and voltages (if your motherboard allows). If your computer reboots abruptly during this test, it's a strong indicator that your PSU is either insufficient for your components' power demands or is degraded and failing to deliver stable power under load.
Network Troubleshooting: Wifi Analyzer, Angry IP Scanner
Even network issues can sometimes feel like hardware problems, especially if they lead to system slowdowns or application crashes.
- Wifi Analyzer (from Windows Store or third-party apps): Helps diagnose wireless network issues. It can show you channel interference, signal strength, and other nearby networks, helping you optimize your WiFi connection.
- Angry IP Scanner: A fast, open-source network scanner that scans IP ranges to detect live hosts, check open ports, and gather basic information. Useful for checking the health and connectivity of devices on your local network.
Maintenance & Other Useful Tools
While not strictly diagnostic, these tools can resolve symptoms that mimic hardware failure or help maintain your system's health.
- CCleaner: Primarily for cleaning temporary files and registry entries. While it can resolve software-related symptoms, it's not a hardware diagnostic tool and should be used cautiously, especially with registry cleaning.
- Malwarebytes (or similar antimalware): Malware can wreak havoc, consuming resources and causing system instability that might be mistaken for hardware failures. Regular scans are essential.
- JScreenFix: A web-based tool that claims to fix stuck pixels (pixels that are always on a single color, unlike dead pixels which are always off) on OLED and LCD panels.
- SpeedFan: Allows control of fan speeds and curves (if supported by your motherboard), useful for fine-tuning cooling and managing noise.
The Proactive Approach: Preventing Future Failures
The best diagnostic is often the one you never need. A proactive maintenance strategy can significantly extend the life of your hardware and prevent many of the issues we've discussed.
- Keep Drivers Updated from Official Sources: Always download drivers directly from the manufacturer's websites (NVIDIA, AMD, Intel, motherboard manufacturer). Avoid generic driver update utilities that can sometimes install incorrect or outdated versions.
- Monitor Temperatures Regularly: Make a habit of checking your CPU and GPU temperatures using HWiNFO, HWMonitor, or Open Hardware Monitor, especially under load. Consistently high temperatures are a primary indicator of cooling problems and can lead to component degradation.
- Clean Your Computer's Filters and Fans: Dust is the enemy of electronics. Regularly clean out dust from your PC's fans, heatsinks, and air filters. This ensures optimal airflow and prevents overheating.
- Avoid Prolonged Hardware Overloads: While stress tests are fine for diagnostics, don't continuously push your hardware to its absolute limits, especially if you have a lower-spec machine or inadequate cooling.
- Disable Overclocking if Instability is Observed: If you've overclocked your CPU or GPU and start experiencing crashes or instability, the first troubleshooting step should always be to return your components to stock speeds. Overclocking, while it can boost performance, can also introduce instability if not done carefully.
Your Next Steps: Taking Action Against Hardware Faults
Understanding advanced diagnostics and hardware failure indications isn't just about identifying problems; it's about empowering you to take decisive action. If you've used these tools and pinpointed a failing component, your next steps are clear:
- Back Up Immediately: If a drive is failing, rescue your data now.
- Replace or Repair: Order replacement parts or seek professional repair for confirmed faulty components.
- Address Cooling: If overheating is the issue, improve airflow, clean components, or consider upgrading your cooling solution.
- Reinstall Drivers: For driver-related issues, perform a clean reinstallation.
By combining careful observation, systematic use of diagnostic tools, and a proactive maintenance mindset, you can keep your PC running smoothly and tackle even the most stubborn hardware issues with the confidence of an expert.